 To begin, I selected the colours I wanted to use. I love nude shades of pinks and browns so from my MAC palette I chose: 'Naked Lunch' which is a beautiful nude tone, 'Sweet Lust' which is pretty pink shimmery shadow and 'Satin Taupe' which is a shimmery dark brown. And instead of using an eyeliner on the upper lid, I have used MAC's 'Carbon' eyeshadow which is a smokey, matte black.
 |
| Crownbrush small eyeshadow brush (left) and MAC 286 (right) |
 |
| Crownbrush angled eyeliner brush |
So, first of all I covered the lid with the two pink tones mixed together. Use the eyeshadow brush to get an even coverage and take it up to the crease and the outer corner of the eye.
_________________________
Then, using the eyeshadow brush again, apply the brown halfway across the lid and take it out to the outer corner of the eye. Make its as strong or as heavy as you prefer. You can wing it out slightly as well like I have done here. Don't take it past the crease at this point.
__________________________
Once you are happy with the brown, take the blending brush and blend the brown into the crease of the eye and out towards the outer corner of the eye as well. Be sure the blend the brown and pink to get rid of the line separating them but not so much that you completely blend the two colours together- you still want to be able to see both colours. I find using circular motions with the blending brush to be a good technique to blend and to avoid patchy-ness.
________________________
Then bring the brown down underneath the eye using the eyeshadow brush and blend along the lower lashline. This helps to define the eye shape more.
_______________________
With the angled eyeliner brush, apply the black eyeshadow along the upper lashline. This creates more definition and using eyeshadow as a liner is great for daytime looks. If you like heavier liner, use a gel/liquid eyeliner and apply it along the upper lashline and wing it out past the outer corner of the eye. This will also be perfect if you want to make this look more glam for a night out.
________________________
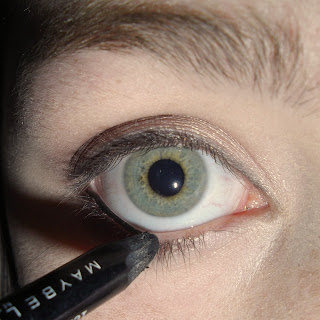
For more definition, use a black kohl eyeliner along the waterline. I have used Maybelline's 'Master Drama' in 'Ultra black'. I am in love with this eye pencil because it is so versatile in its uses and I love an intense black.
_____________________
To finish off, generously apply some mascara to the upper and lower lashes to really make your eyes pop. I've used MAC's 'zoom lash' in black. I really like this mascara, it works really well for me as my lashes are short as well as straight (worst combo!) and it adds volume as well as length.
_____________________
The finished look!
Thank you so much for reading and hope you enjoyed it!
~Beth x


No comments:
Post a Comment